Diffused Light
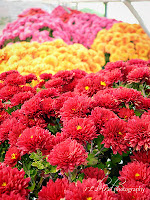
Don't discount those overcast days. In fact, they are the best ones to photograph in. You've probably heard this time and time again, but if you haven't tried it yet, now's the time. The diffused light cuts down on the contrast, and the soft, diffused light actually enhances color. But don't put your camera away if it's bright and sunny either. Just make sure you are shooting with the sun at your back.
 Saturation
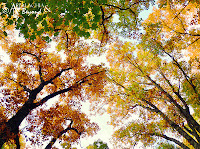
The strong color in the remarkable fall photos you see in magazines is usually added in post production. However, not everyone is blessed with the ability to over-saturate in Photoshop. So, when you're out in the field, there are a couple of things you can do to enhance what your camera's sensor sees.
White Balance - Don't always trust your white balance. Nearly every digital camera on the market today allows you to adjust your white balance in some way. Try telling your camera that it is "Shady" or "Cloudy" for a warmer appearance. This will enhance all those scrumptious yellows, reds, and oranges.
Complimentary Colors - Go Old School and shoot complimentary colors to enhance the appearance of the object of affection. That mountainside would look great next to that ultra blue sky (try a polarizing filter if your feeling spunky). And a purple fall flower will "pop" more when enhanced with a yellow, leafy, bokeh background (use a wide aperture for this).
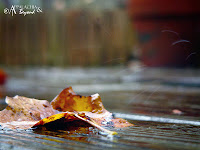
Wet vs. Dry Leaves - Along the same lines as those overcast days, don't discount rainy fall days either. Wet leaves will produce a more vibrant effect than sun-dried leaves.


Simplicity
Look for objects that stand out from the crowd. Then apply everything you know about the Rule of Thirds to lead the eye there. Applying this simplicity to an isolated object (one leaf, one tree, one color on a background full of others, etc) will offer a photo just as powerful as that autumnal vista you shot earlier in the day.
Focus
Unless you're really into breaking the rules, make sure you are using the "proper" focus for the photograph you are wanting. To get those clean, crisp landscapes, make sure you're using a small aperture (f/11 or greater). For those close-up macro shots with the perfect blurry backgrounds, use a wide aperture (f/5 or less). If you don't have the ability to change your aperture manually, try using the presets Landscape (small) or Macro (wide) in your camera's menu.
 Be Cliche
 Sometimes the best way to learn is to practice what you've already seen. Next time you are out, try to "reproduce" a couple of photos you've seen that week that inspired you. Think about what techniques, perspectives, and light that photographer must have had to use in order to get the shot she did. The fun part is seeing how close you came!
So what are you waiting for?! Get out and shoot. Then, comment us a link where we can see all your beautiful photos.
Can't wait!
Robin & Tim


