
I've never written a pack review, so please bear with me. I recently had the desire to purchase a new day pack. Requirements: it had to be a hydration pack or hydration compatible, and it had to have some space to carry an extra layer, rain gear, or lunch on a nice day hike. Other than that I was pretty much open. I looked at several packs on the interwebs and finally decided on the
Camelbak Octane 18x and purchased it from Sunnysports.com, which might I add, was a very simple and easy transaction once I convinced wifey it was a necessary. I ordered on a Friday, got free Standard UPS Ground (5-7 business day) shipping and my pack was here on the following Wednesday - ahead of schedule! Woot!
Specs:
- 70 oz / 2 L OMEGA HydroTanium Reservoir with Lifetime Warranty
- Front & Back Reflectivity
- Ultra-Light Materials
- Waist Belt Pockets
- Expandable
- Back panel: Air Channel
- Harness: Independent Suspension
- Belt: 25 mm / 1" Stability Belt
- Capacity: 1276 cu in
- Pack Dimensions: 18 x 12.5 x 9 in
- Weight: 16 oz; Full reservoir - 5.69 lb

The pack features a main compartment that is expandable by unzipping the outside flap. There's also some cinch cords to compress the pack some. Inside the middle flap is an external pocket that allows storage of some miscellaneous gear items (i.e. maps, first aid kit, thing you want easy access to). The pockets on the waist belt are small but there's enough room in each of them for spare batteries, keys, granola bars, crackers etc. Finally there is one loop on the back of the pack towards the bottom which allows you to stow away your trekking poles if you are carrying them along as well. Additionally the pack is made out of a ripstop fabric that helps keep it light.

My first use of the pack was this past weekend when we hiked up to the
Tri-State Peak in Cumberland Gap NHP. In the main compartment, I kept beanies, gloves, socks, emergency kit (i.e. candles, matches, lighter, magnesium fire starter, headlamp, etc). There is a small zippered pocket on the the side outside the back flap where I carried my whistle/compass combo and a small led flashlight. In the middle outside pocket I carried the map of the park, a poncho, emergency hand warmer, and Beene's water bowl.

This was all that I carried in the pack along with some snacks (2 granola bars and 2 packs of crackers) in the waist belt pockets, a spare battery and a white card for the camera. In addition, the hydration bladder is kept in a separate compartment in the very back of the pack. It's easy to remove for filling and a breeze to put back in. On the outside of the pack I was able to strap my phone (used for
Trimble Outdoors GPS) on the sternum strap, and my 2 meter handie talkie (ham radio) on the shoulder strap. After a mile into this hike I stopped and took off my fleece and was able to stow it away inside the main compartment quite nicely and still had room for a couple more small things if needed.

Things the wife had to say:
Overall, she liked the pack. There were some things she noticed that were a little "off" about it. She didn't like that there were no organizational pockets inside the main compartment. All the little things I carry fall to the bottom where you have to dig, dig, dig for them. She also thought some of the cinch straps should have roll up clips or something. She said with them just dangling there, they were bound to eventually get caught on something. She also didn't care for the adjustable sternum strap. It moves around a bit much - maybe it'll stay put once I get the pack broke in, but until then it gets all crooked and looks like it would surely feel awkward. Last, but not least, she loves the ultralight ripstop material, but wonders how long it will actually last. She thinks the first time I try to crawl under a pine fall, it'll rip for sure. "Ripstop or not," she says, "a hole is a hole." Guess we'll have to wait and see.


All in all, I have to say that I am pretty pleased with the pack and at $54.99 and free shipping from
Sunnysports.com, it was well worth the it. The MSRP on this pack is around $75, so I consider it a steal.
Happy Trails,
Tim and Robin
Disclaimer: Tim bought the "Camelbak Octane 18x" to use day hiking and decided to review it here on Appalachia & Beyond. The opinions expressed above are his independent thoughts and experiences.


 First, I don't have any fancy water bladder cleaning utensils, so I use what I have. Vinegar and baking soda are staple cleaners in my house. They're safe to use on just about anything, not harsh, and they are awesome deodorizers. So, for cleaning the bladders, I gathered the two - plus a sanitized bottle brush, sanitized cleaning toothbrush, a pipe cleaner, a bag clip, a wire coat hanger, and a pair of pliers.


 I've never written a pack review, so please bear with me. I recently had the desire to purchase a new day pack. Requirements: it had to be a hydration pack or hydration compatible, and it had to have some space to carry an extra layer, rain gear, or lunch on a nice day hike. Other than that I was pretty much open. I looked at several packs on the interwebs and finally decided on the Camelbak Octane 18x and purchased it from Sunnysports.com, which might I add, was a very simple and easy transaction once I convinced wifey it was a necessary. I ordered on a Friday, got free Standard UPS Ground (5-7 business day) shipping and my pack was here on the following Wednesday - ahead of schedule! Woot!
 The pack features a main compartment that is expandable by unzipping the outside flap. There's also some cinch cords to compress the pack some. Inside the middle flap is an external pocket that allows storage of some miscellaneous gear items (i.e. maps, first aid kit, thing you want easy access to). The pockets on the waist belt are small but there's enough room in each of them for spare batteries, keys, granola bars, crackers etc. Finally there is one loop on the back of the pack towards the bottom which allows you to stow away your trekking poles if you are carrying them along as well. Additionally the pack is made out of a ripstop fabric that helps keep it light.
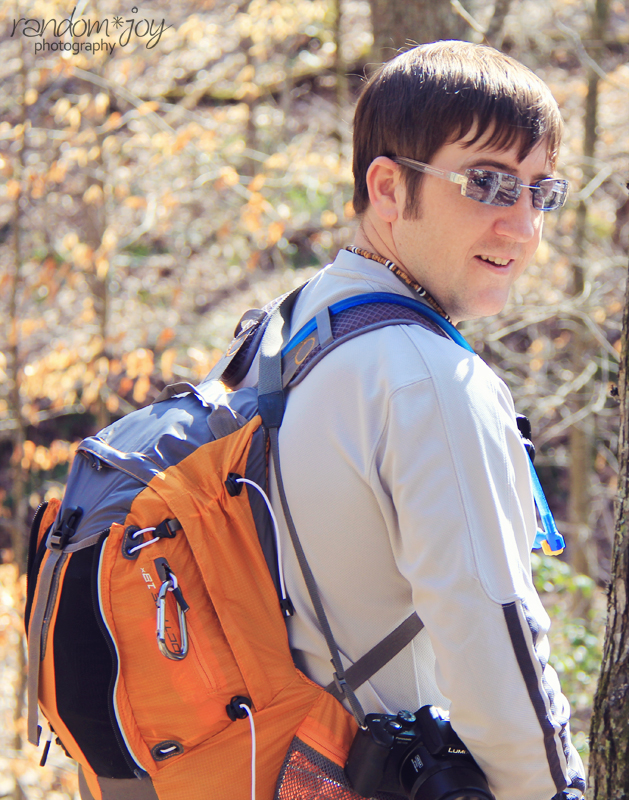 My first use of the pack was this past weekend when we hiked up to the Tri-State Peak in Cumberland Gap NHP. In the main compartment, I kept beanies, gloves, socks, emergency kit (i.e. candles, matches, lighter, magnesium fire starter, headlamp, etc). There is a small zippered pocket on the the side outside the back flap where I carried my whistle/compass combo and a small led flashlight. In the middle outside pocket I carried the map of the park, a poncho, emergency hand warmer, and Beene's water bowl.
 This was all that I carried in the pack along with some snacks (2 granola bars and 2 packs of crackers) in the waist belt pockets, a spare battery and a white card for the camera. In addition, the hydration bladder is kept in a separate compartment in the very back of the pack. It's easy to remove for filling and a breeze to put back in. On the outside of the pack I was able to strap my phone (used for Trimble Outdoors GPS) on the sternum strap, and my 2 meter handie talkie (ham radio) on the shoulder strap. After a mile into this hike I stopped and took off my fleece and was able to stow it away inside the main compartment quite nicely and still had room for a couple more small things if needed.


